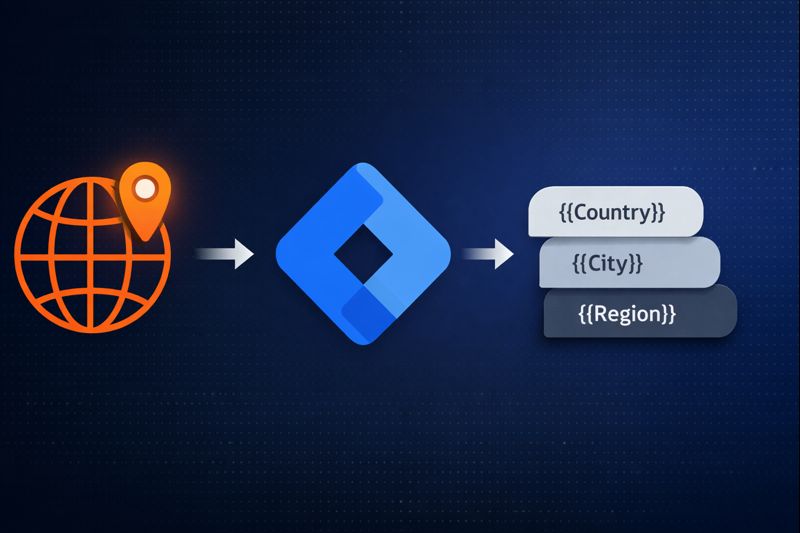
Get Visitor Location Data in Google Tag Manager
If you’re a marketer using Google Tag Manager, you’ve probably hit this frustrating roadblock: you need to know where your visitors are coming from to personalize content, trigger location-specific tags, or segment your analytics—but getting location data into GTM without developer help feels impossible.
You’re not alone. Marketing teams struggle with this daily. They need to show different offers to visitors from different countries, fire region-specific tracking pixels, or simply understand which locations drive the most conversions. Yet traditional geolocation solutions require backend integration, API key management, and coding skills most marketers don’t have.
The good news? You can now get visitor location data directly in Google Tag Manager without writing a single line of code—all through a simple GTM template installation.
What Location Data You Can Get in Google Tag Manager
VisitorAPI provides comprehensive location data that becomes instantly available as Google Tag Manager variables. Here’s exactly what you get:
Country-Level Data
Country Code - The two-letter ISO country code (e.g., US, AU, GB, CA). This is the most commonly used variable for triggering location-specific tags. Available as {{Country Code}} variable in GTM.
Country Name - The full country name (e.g., United States, Australia, United Kingdom). Perfect for displaying location information to users or personalizing content. Available as {{Country Name}} variable in GTM.
Currencies - An array of official currencies for the detected country (e.g., AUD for Australia, EUR for France). Essential for e-commerce sites that need to display prices in local currency. Available as {{Currencies}} variable in GTM.
Languages - An array of official languages for the detected country. Useful for triggering language-specific content or setting default language preferences. Available as {{Languages}} variable in GTM.
Region and City Data
Region - The state, province, or region name (e.g., California, New South Wales, Ontario). This follows the ISO-3166-2 standard and provides precise sub-country location data. Available as {{Region}} variable in GTM.
City - The city name where the visitor is located (e.g., Los Angeles, Sydney, Toronto). Perfect for hyper-local personalization and city-specific offers. Available as {{City}} variable in GTM.
City Latitude/Longitude - Geographic coordinates of the detected city. Useful for calculating distances, showing nearest store locations, or building location-based features. Available as {{City LatLong}} variable in GTM.
All of this data is detected automatically based on the visitor’s IP address with 99.99% accuracy at the country level. The detection happens in approximately 25ms, ensuring your location-based tags and personalization fire without noticeable delay.
How to Get Visitor Location in Google Tag Manager
Getting visitor location data into Google Tag Manager takes about 5 minutes and requires zero coding. Here’s the high-level process:
Quick Setup Overview
- Import the VisitorAPI template from the GTM Template Gallery
- Create a free VisitorAPI account at app.visitorapi.com and get your Project ID
- Create the VisitorAPI tag in GTM with your Project ID
- Create GTM variables for the location data you need (Country Code, Region, City, etc.)
- Build location-based triggers using the
visitor-api-successevent - Test in Preview mode and publish
The free tier includes 1,000 requests per month—perfect for testing and small sites. No credit card required.
For detailed step-by-step instructions with screenshots, see our complete Google Tag Manager Setup Guide.
Available Data Layer Variables
Once set up, you can create GTM variables for any of these data layer values:
| GTM Variable Name | Data Layer Variable | Example Value |
|---|---|---|
| Country Code | visitorApiCountryCode | US, AU, GB |
| Country Name | visitorApiCountryName | United States |
| Region | visitorApiRegion | California |
| City | visitorApiCity | Los Angeles |
| City LatLong | visitorApiCityLatLong | 34.0522,-118.2437 |
| Currencies | visitorApiCurrencies | USD, AUD, GBP |
| Languages | visitorApiLanguages | en, es |
Creating Location-Based Triggers
The key to geo-targeting in GTM is creating triggers based on the visitor-api-success event. This event fires when location data is available.
Example triggers you can create:
- US Visitors: Custom Event
visitor-api-successwhereCountry CodeequalsUS - EU Visitors: Custom Event
visitor-api-successwhereCountry CodematchesFR|DE|IT|ES|NL|BE|AT|PT|IE|FI|SE|DK|PL - California Residents: Custom Event
visitor-api-successwhereRegionequalsCalifornia - Non-US Visitors: Custom Event
visitor-api-successwhereCountry Codedoes not equalUS
Once you have these triggers, attach them to any tag—Meta Pixel, Google Ads, Custom HTML banners, consent management, and more.
Real-World Use Cases for Location Data in GTM
Now that you have visitor location data in Google Tag Manager, let’s explore specific ways marketing teams use it to increase conversions and improve campaign performance.
Use Case 1: Geo-Targeted Popups and Banners
The Goal: Show different promotional offers to visitors based on their country or region.
How It Works: Create Custom HTML tags in Google Tag Manager that display location-specific popups or banners. Use your location-based triggers to control when each variant appears.
Example Implementation:
- Visitors from Australia see: “Free shipping across Australia on orders over $100 AUD”
- Visitors from United Kingdom see: “Free UK delivery on orders over £75”
- Visitors from United States see: “Free US shipping on orders over $99”
Expected Impact: 20-35% increase in popup conversion rates because the messaging is relevant to the visitor’s location and currency.
GTM Setup: Create three Custom HTML tags with different banner content, each triggered by country-specific triggers (Country Code equals AU, GB, or US).
Use Case 2: Regional Compliance Tag Management
The Goal: Fire different tracking and consent tags based on visitor location to comply with regional privacy laws.
How It Works: Use location-based triggers in Google Tag Manager to control which tags fire in which regions. This ensures GDPR compliance for EU visitors, CCPA compliance for California residents, and appropriate privacy handling globally.
Example Implementation:
- EU visitors (FR, DE, IT, ES, etc.) → Trigger GDPR consent banner, block non-essential tags until consent
- California visitors (Region equals California) → Display CCPA opt-out notice
- Other visitors → Standard cookie notice
Expected Impact: Reduced legal risk, proper compliance with regional regulations, maintained user trust.
GTM Setup: Create location-based trigger groups for EU countries and California. Use these triggers to control your consent management tags and block non-essential tags until appropriate consent is obtained.
Use Case 3: Enhanced Advertising Pixel Performance
The Goal: Improve Event Match Quality (EMQ) scores for Meta Pixel and enhance Google Ads conversion tracking by passing accurate location data.
How It Works: Map your Country Code variable to the country parameter in Meta Pixel advanced matching. Pass location data to Google Ads conversion tags for enhanced conversions.
Example Implementation:
- Meta Pixel: Add Country Code to advanced matching parameters
- Google Ads: Include location data in conversion tag parameters
- TikTok Pixel: Pass country and city data for better audience matching
Expected Impact: 15-30% improvement in Event Match Quality scores, better ad attribution, lower cost per acquisition.
GTM Setup: Edit your Meta Pixel tag, expand Advanced Matching, and map {{Country Code}} to the country field. For Google Ads, add location parameters to your conversion tags.
See our guide on enhancing Meta Event Match Quality with VisitorAPI for detailed instructions on improving your EMQ score.
Use Case 4: Dynamic Shipping and Payment Options
The Goal: Show region-appropriate shipping methods and payment options based on visitor location.
How It Works: Use Custom HTML tags in Google Tag Manager to inject JavaScript that modifies your checkout page based on detected location. Show or hide payment methods and shipping options dynamically.
Example Implementation:
- Australian visitors → Show Afterpay and Australia Post shipping
- UK visitors → Display Klarna and Royal Mail options
- US visitors → Enable Apple Pay and USPS shipping
Expected Impact: 10-25% reduction in checkout abandonment because visitors see familiar, available payment and shipping methods.
GTM Setup: Create Custom HTML tags with JavaScript that shows/hides elements based on Country Code. Use location-based triggers to fire the appropriate variant for each market.
Common Questions About Location Detection in GTM
How accurate is the location data?
VisitorAPI provides 99.99% accuracy at the country level, approximately 90% accuracy at the city level. This level of precision is sufficient for nearly all marketing use cases in Google Tag Manager.
Does location detection slow down my website?
No. VisitorAPI’s location lookup happens asynchronously in approximately 25ms and doesn’t block page rendering. Your GTM tags will have access to location data without noticeable delay.
Can I use this for compliance purposes?
Yes. VisitorAPI is GDPR and CCPA compliant and uses 256-bit SSL encryption. The service doesn’t store IP addresses, making it suitable for privacy-conscious implementations. Use location data in GTM to trigger appropriate consent mechanisms for different regions.
What happens if the API call fails?
If VisitorAPI cannot detect location (rare, but possible due to network issues), the visitor-api-success event won’t fire, and your location-based triggers won’t activate. Your other GTM tags continue to work normally. Implement fallback logic for critical location-dependent features.
Can I detect VPN users?
Location detection is based on IP address, so if a visitor uses a VPN, their detected location will reflect the VPN server location, not their actual location. This is a limitation of all IP-based geolocation services and affects a small percentage of traffic.
Get Started Free
Ready to get visitor location in Google Tag Manager? Setup takes about 5 minutes:
- Import the VisitorAPI template from GTM Gallery
- Sign up free at app.visitorapi.com
- Create the tag in GTM with your Project ID
- Build location-based triggers and publish
The free tier includes 1,000 requests per month. No credit card required.